
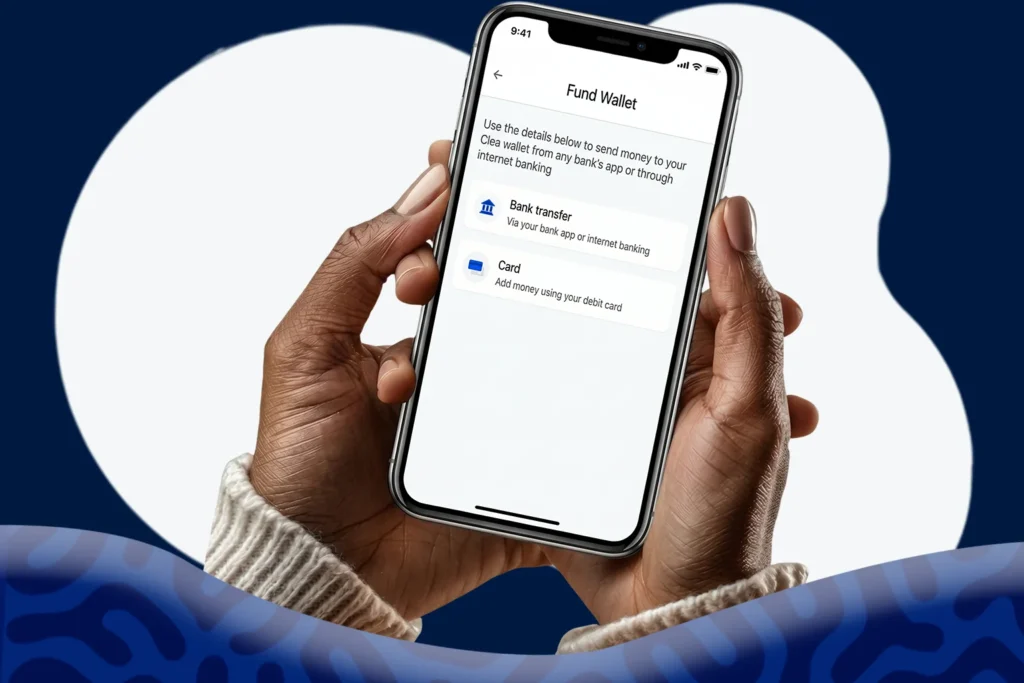
Knowing how to fund your Clea wallet is one of the first things you’ll want to sort out after your account is approved, especially if you’re getting set to pay a supplier in China, settle a Copart bill, or send money to a vendor in the US.
Your Naira and USD wallets are already set up once your account is approved. You fund your naira wallet with a regular bank transfer from any Nigerian bank, and you fund your USD wallet with stablecoins, either USDC or USDT.
Here’s how to do both on the app and the web.
How to Fund Your Naira Wallet on the Clea App
Step 1: Sign In to Your Account
Open the Clea app and log in with your registered email and password.
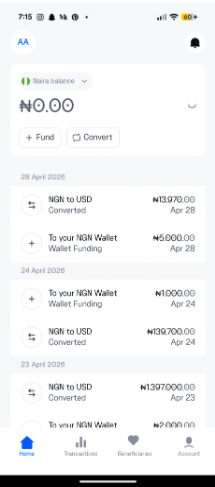
Your home screen opens straight to your naira wallet. You’ll see your balance at the top and a list of any transactions you’ve made before underneath it.
If this is your first time logging in after approval, your balance will read ₦0.00. That’s normal, you haven’t funded it yet.
Step 2: Start a Deposit
On the home page, tap the Fund button.
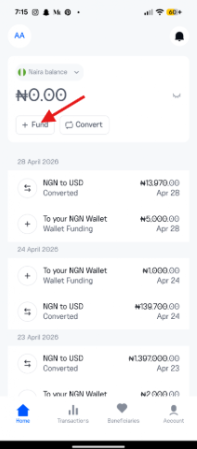
This takes you to the fund wallet page, where you’ll pick how you want to add money.
Step 3: Pick Your Funding Method
On the fund wallet page, select Bank Transfer.
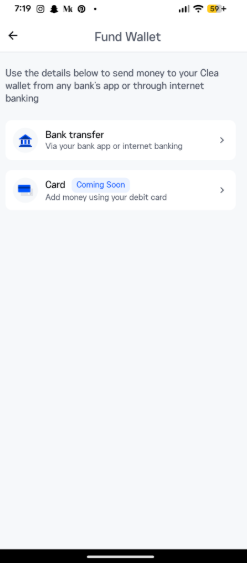
You will then see your dedicated set of account details linked to your wallet. There are three things on this screen:
- Bank name (the bank holding the account)
- Account number (the number you’ll send money to)
- Account name (the name the account is registered under)
These details are unique to your Clea account. Anything sent to that account number lands directly in your Naira wallet.
Step 4: Send the Money from Your Bank
Copy the account number, then open your Nigerian bank app or internet banking platform, and start a transfer.
Paste the account number in the recipient field and select the bank Clea showed you.
When the recipient details load on your bank app, take a second to confirm two things:
- The bank name matches what’s on your Clea screen
- The account name matches what’s on your Clea screen
This check is important. If anything looks off, stop and double-check the account number before you send.
Enter the amount you want to deposit and complete the transfer.
Step 5: Your Naira Wallet Is Credited
Once your bank transfer goes through, your naira wallet is credited immediately. You’ll see your new balance reflected on the home page and a new entry in your transaction list.
If a few minutes pass and you don’t see the money, refresh the app and confirm the transfer actually left your bank account.
How to Fund Your USD Wallet on the Clea App
Step 1: Switch Wallets
On the home page, tap on your Naira balance.
This switches your home view from the naira wallet to the USD wallet. You’ll now see your USD balance and any past stablecoin deposits.
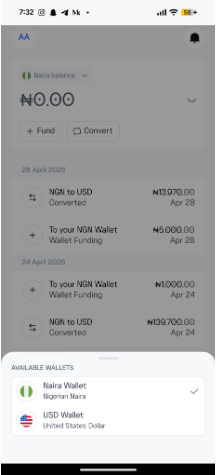
Step 2: Tap Fund to Start a Deposit
With your USD wallet showing, tap the Fund button.
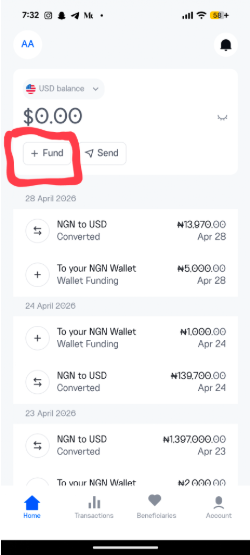
Step 3: Choose Stablecoin
On the fund wallet page, select Stablecoin.
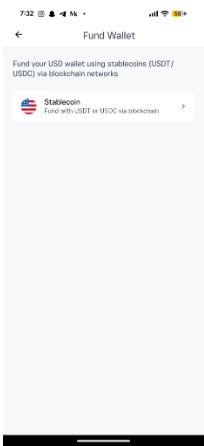
This is where you tell Clea which stablecoin you’re sending and on which network.
Step 4: Choose a Network
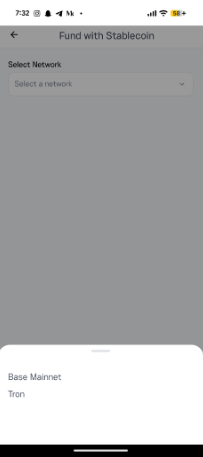
Pick the right network that matches the stablecoin you’re sending:
- If you’re sending USDC, choose Base Mainnet
- If you’re sending USDT, choose Tron
These are the only supported networks.
Step 5: Copy Your Wallet Address and Send Your Stablecoins
Once you’ve selected the network, Clea generates a wallet address for your deposit and displays it on screen.
Tap to copy the address. Don’t try to type it out by hand, crypto addresses are long and case-sensitive, and one wrong character means the money goes somewhere else.
Blockchain transactions can’t be reversed once confirmed, so if you send to the wrong address, the funds are usually gone. If you’re sending a large amount, send a small test transfer first to be safe.
Step 6: Send Your Stablecoins From Your Exchange or Wallet
Open the exchange or wallet you’re sending from, Binance, Bybit, Trust Wallet, MetaMask, whichever one holds your stablecoins.
Start a withdrawal or send transaction, paste the Clea wallet address as the recipient, and pick the same network you selected on Clea.
Confirm the amount and send. Depending on the network and the platform you’re sending from, the transfer usually arrives within a few minutes.
Step 7: Submit Your Transaction Hash
Once you’ve sent the stablecoins, your exchange or wallet will give you a transaction hash.
Copy that hash, go back to the Clea app, paste it into the transaction hash field, and tap Submit Transaction.
Your USD wallet is credited right after.
How to Fund Your Clea Wallet on the Web
If you’d rather work from your laptop or a desktop, the web version of Clea follows the same flow as the app.
Step 1: Log In to Your Account
Visit tryclea.com, click Login, and sign in with your registered email and password.
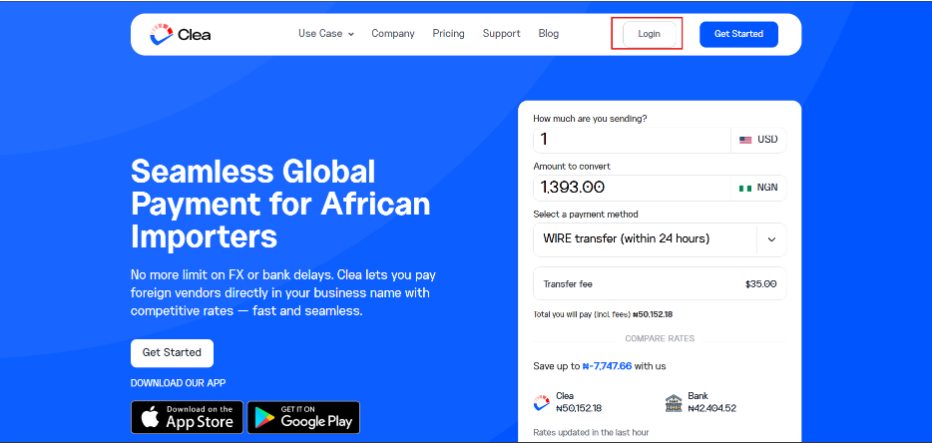
Your home page opens with your naira balance displayed at the top.
Step 2: Fund Your Naira Wallet
Click Fund.
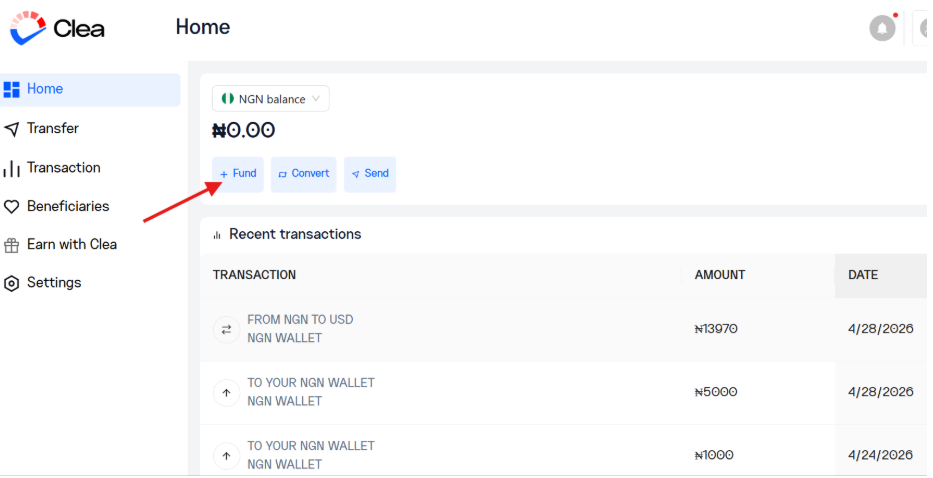
Then choose Bank Transfer, and Clea will display the same account details you’d see on the app: bank name, account number, and account name.
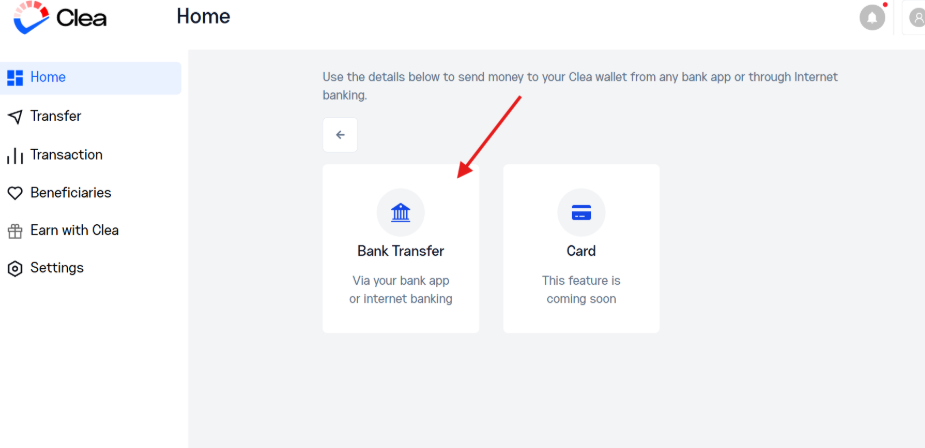
Copy the account number, transfer money to it from your Nigerian bank, and your naira wallet is credited immediately.
Step 3: Fund Your USD Wallet
To fund your USD wallet on the web, click on your naira balance to switch wallets.
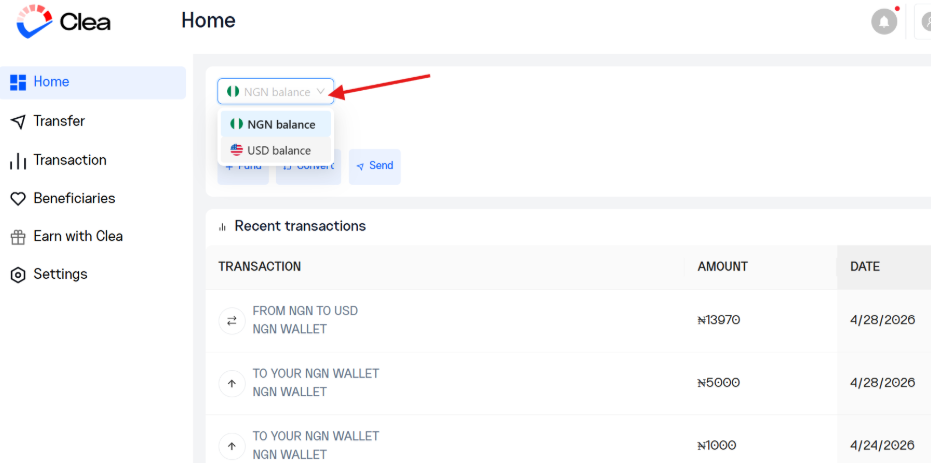
Click Fund, then choose Stablecoin.
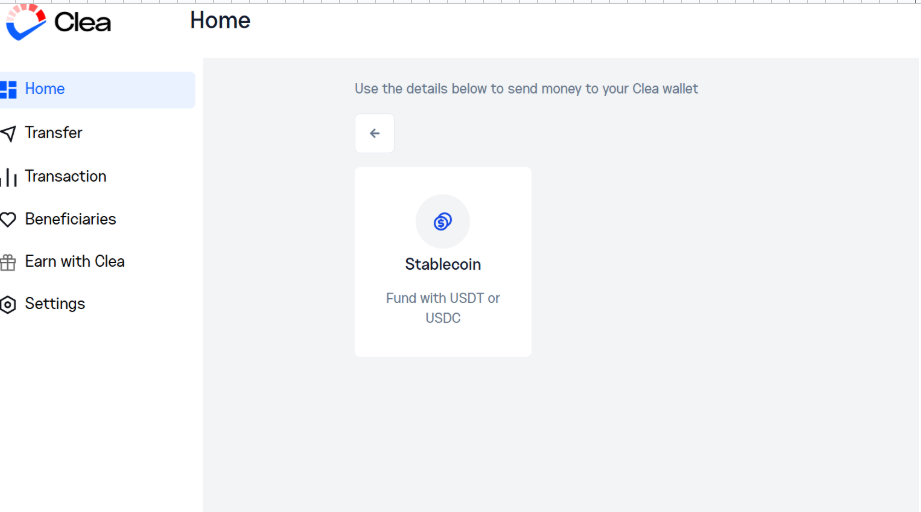
Select your network: Base Mainnet for USDC, Tron for USDT.
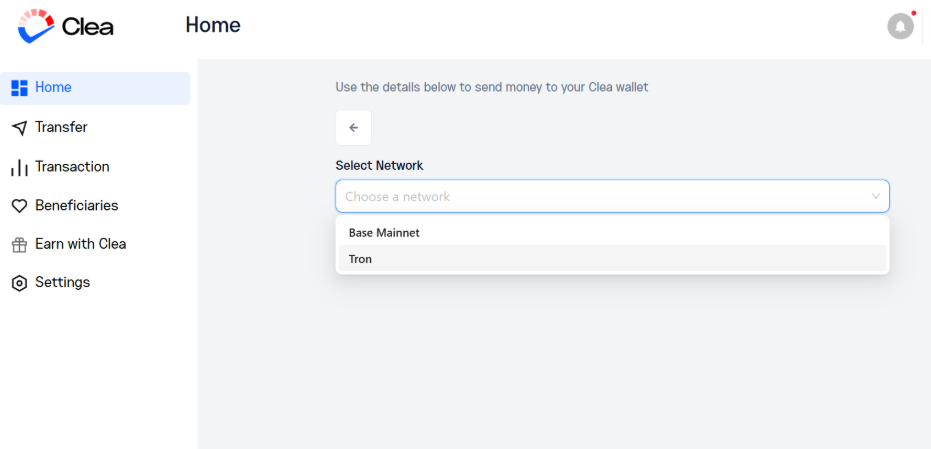
Copy the wallet address Clea generates, send your stablecoins from your exchange or wallet on the correct network, and paste your transaction hash back into Clea to confirm the deposit.
Finding Your transaction Hash
A transaction hash (sometimes called a TxID, Tx Hash, or Transaction ID) is a unique string of letters and numbers generated every time a crypto transaction is made. It’s how the blockchain records your transfer, and it’s how Clea matches your stablecoin deposit to your account.
Every wallet and exchange stores transaction hashes a little differently, but the process for finding yours is roughly the same.
Step 1: Open the Wallet or Exchange You Sent From
Go to the platform you used to send the stablecoins to Clea, whether that’s a crypto exchange like Binance, Bybit, OKX, or a self-custody wallet like Trust Wallet or MetaMask.
Step 2: Go to Your Transaction History
Look for a section called Transaction History, Withdrawal History, Activity, or Asset History. This is where every transfer you’ve made is recorded.
Step 3: Find Your Withdrawal to Clea
Locate the transaction where you sent USDC or USDT to your Clea wallet address. It’s usually the most recent one if you just sent it.
Step 4: Open the Transaction Details
Tap or click the transaction to open its full details. You’ll see information like the amount sent, the recipient address, the network, the date, and the status.
Step 5: Copy the Transaction Hash
Look for a field labeled Transaction Hash, TxID, Tx Hash, or Transaction ID. They all mean the same thing.
The hash is a long string of letters and numbers. Tap the copy icon next to it, or long-press to copy the full string.
Step 6: Paste It on Clea and Submit
Head back to the Clea app or web, paste the hash into the transaction hash field on the fund wallet page, and tap Submit Transaction.
Frequently Asked Questions
How long does it take for my Naira wallet to be credited?
Right after your transfer goes through. Most deposits land in seconds. If a few minutes pass and you don’t see your funds, refresh the app, confirm the transfer left your bank account, and check that you sent to the correct account number.
My USD wallet still hasn’t been credited after I submitted the transaction hash. What do I do?
First, confirm the transaction is fully confirmed on the blockchain. If it shows as confirmed and your wallet still isn’t credited, reach out to our support with your transaction hash and registered email, and the team will look into it.
Can I fund my Clea wallet from Binance, Bybit, or another exchange?
Yes. As long as the exchange supports withdrawals on Base Mainnet (for USDC) or Tron (for USDT), you can withdraw directly to the wallet address Clea generates.
Can I fund my Clea wallet directly in USD using my international card or a domiciliary account?
Not at the moment. The USD wallet is funded with stablecoins (USDC and USDT) only. If you don’t already hold stablecoins, you can fund your naira wallet first and use Clea to convert naira to USD inside the app.